How to Record a Chrome Tab With Audio
Record any browser tab together with its sound and your microphone, then save it as a video file. No account, no watermark, no time limit.
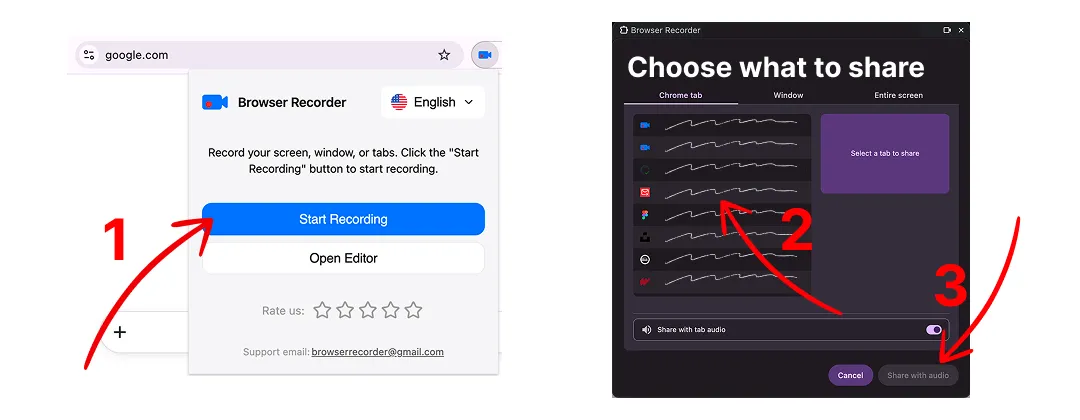
Recording a browser tab sounds simple until you try it. Chrome’s own screenshot tools capture pixels but no sound. Desktop recorders capture sound but grab your whole screen, notifications included. Browser Recorder does the narrow thing well: one tab, its audio, your microphone, saved locally.
This guide walks through a full recording, from install to saved file.
Install the extension
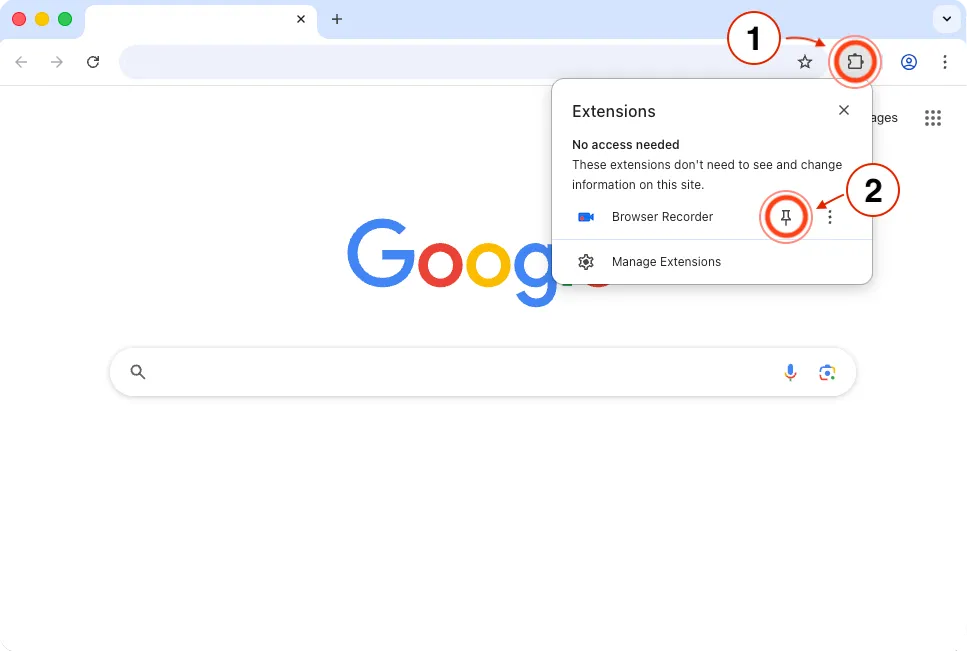
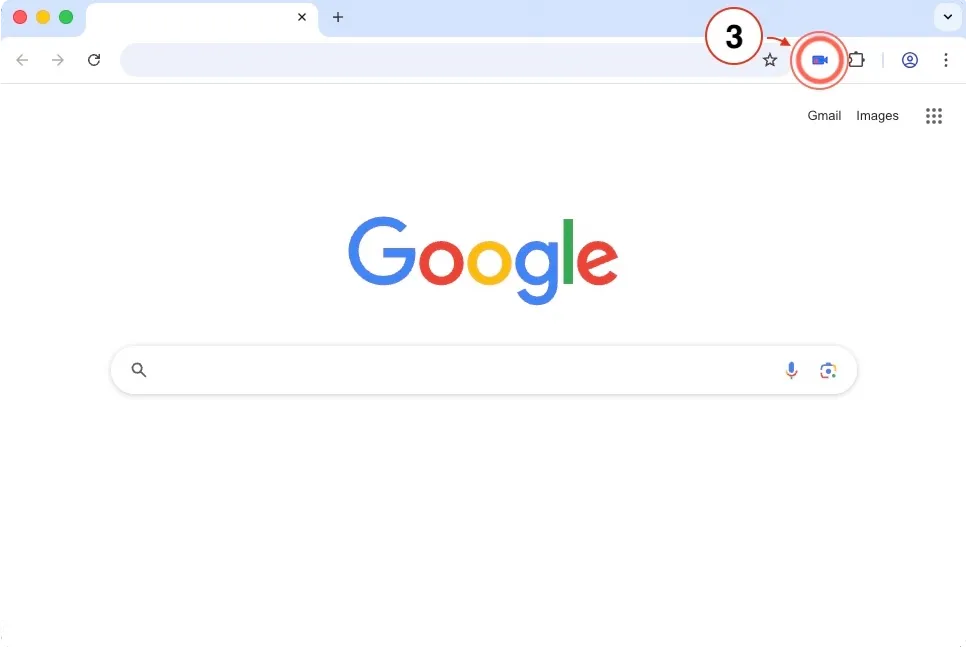
Add Browser Recorder from the Chrome Web Store. Pin it to your toolbar after installing, because recording starts from the toolbar icon, and hunting through the extensions menu every time gets old fast.
Click the puzzle-piece icon in Chrome’s toolbar, find Browser Recorder, and click the pin.
Choose what to capture
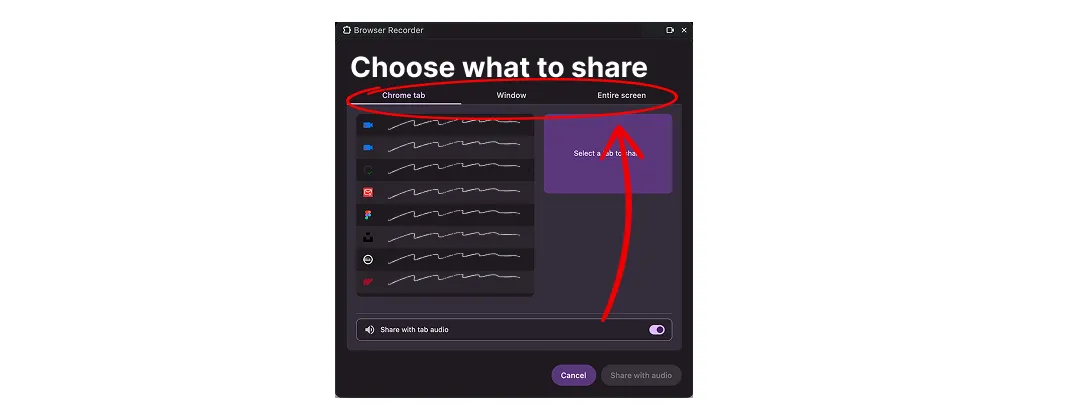
Open the tab you want to record, then click the Browser Recorder icon. You pick the source before recording starts:
- This tab: records only the current tab. Switching tabs mid-recording does not change what is captured, which is what you want for a clean walkthrough.
- Entire screen: records everything, including windows outside Chrome.
- Application window: records one app window, Chrome or otherwise.
For guides and product demos, pick the tab. It keeps your other windows, bookmarks, and notifications out of the finished video.
Turn on the audio you need
There are two independent audio sources, and mixing them up is the most common mistake:
- Tab audio: the sound the page itself makes. Needed for video playback, music, a call in a web app.
- Microphone: your voice narration.
Enable both for a narrated demo. Enable only the microphone for a talking-head clip. Enable only tab audio when you are archiving something that plays sound and do not want your room noise in it.
If your microphone is silent, Chrome is usually the culprit rather than the
extension: check chrome://settings/content/microphone and confirm the site is
allowed and the correct input device is selected.
Record
Click Start recording. Chrome shows its own sharing indicator so you always know capture is live.
A few habits that make the raw footage usable:
- Wait two seconds after starting before you speak or click. That silence gives you a clean cut point later.
- Move the mouse deliberately. Fast, jittery cursor movement is much harder to follow at video framerates than it feels live.
- Pause instead of stopping if you need to regroup. Pausing keeps everything in one file; stopping ends the recording.
Save the file
Click Stop. The recording opens in a preview so you can watch it before committing to it.
Download it and the video lands in your normal Chrome downloads folder as a standard video file, playable anywhere, ready to drop into a video editor, and uploadable to YouTube, Loom, Slack, or a docs page without conversion.
Nothing is uploaded during any of this. The recording is produced in your browser and stays on your machine until you decide to share it.
Troubleshooting
The video has no sound. Tab audio was off, or the tab was muted in Chrome. Chrome’s mute applies before the extension sees the stream.
The recording stopped on its own. Closing or reloading the recorded tab ends the capture. Record the entire screen instead when your workflow requires reloading the page.
The file is larger than expected. Screen recordings of full-motion video are big by nature. Recording a single tab rather than a 4K display is the biggest single saving; after that, shorten the clip or compress it in an editor.
Nothing happens when I click the icon. Chrome does not allow extensions to
capture its internal pages such as chrome:// URLs, the Web Store, and the new tab
page are all off limits. Open a normal website and try again.
Keep reading
How to Record Screen With Audio
How to record screen with audio straight from the browser: no desktop install, no account, no upload. Here is what that trade-off actually costs you.
Free Loom Alternatives in 2026: Browser Recorder vs Loom
Comparing Loom alternatives in 2026? Browser Recorder records locally with no five-minute cap and no watermark, free or $39 once. Here is how it stacks up.
Browser Recorder vs Cursorful: A Free Cursorful Alternative
Cursorful charges $79 for commercial use, mic and camera. Browser Recorder is free. Here is how the two Chrome screen recorders actually compare.