How to Record Screen With Audio
How to record screen with audio straight from the browser: no desktop install, no account, no upload. Here is what that trade-off actually costs you.
Most tools that record screen with audio want a desktop installer, an account, and a subscription before they capture a single second. For a quick bug report or a two-minute walkthrough, that is a lot of ceremony.
A browser extension skips all three: it records the screen, the tab’s sound and your microphone from the tab you already have open. It is worth understanding exactly what you gain and what you give up.
How to record screen with audio in Chrome
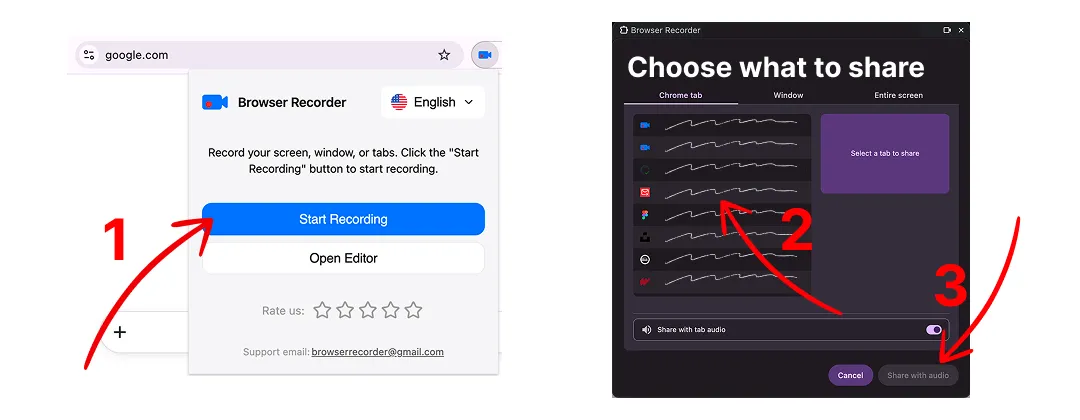
- Install the extension and pin it to the toolbar.
- Click record and pick a tab, a window, or the whole screen.
- Tick the audio sources you want: tab audio, microphone, or both.
- Stop, trim, and the file lands in your downloads folder.
That is the whole loop. The full walkthrough covers source selection, mixing tab audio with your microphone, and the settings worth changing before your first take.
What you gain
No installer, no admin rights. This matters more than it sounds. Locked-down work laptops routinely block desktop installs while allowing Chrome extensions.
No upload. Browser Recorder captures with the browser’s own recording APIs. The video is assembled locally and saved to your downloads folder. Nothing touches a server, which sidesteps the question of who else can see a recording of your screen.
No account, no watermark, no time limit. Nothing to sign up for and nothing stamped across the finished video.
Tab-scoped capture. A desktop recorder sees your whole screen, including the notification that arrives thirty seconds in. Recording a single tab gets you a clean take on the first try.
What you give up
No editing timeline. You get trim-and-save, not a multi-track editor. Heavy post-production still belongs in a real editor.
No chrome:// pages. Chrome forbids extensions from capturing its own
internal pages. Settings, the Web Store, and the new tab page cannot be
recorded.
Browser must stay open. Closing Chrome ends the capture, so this is the wrong tool for a long unattended recording.
Record screen with audio on Mac, Windows or Chromebook
The capture runs inside Chrome, so the steps above are the same on macOS, Windows and ChromeOS. That is the part the built-in tools get awkward about: QuickTime on a Mac records your microphone but not the sound the machine is playing, which normally means installing a virtual audio driver first. On Windows, the Xbox Game Bar records app audio but refuses to capture File Explorer or the desktop. A Chromebook cannot install either of them.
Recording a tab sidesteps all three. The tab’s own sound is captured directly, your microphone is mixed in on top, and nothing about the process changes when you move between machines.
When the desktop app is still the right answer
Reach for a desktop recorder when you need to record several applications switching back and forth, produce a long unattended session, or hand the footage to an editor expecting multi-track source files.
For everything else (bug reports, support answers, product demos, lecture clips, feedback on a design), the browser is already open and already has the tab you want to record.
FAQ
Can you record screen with audio on a Chromebook? Yes. A Chrome extension runs on ChromeOS the same way it runs on macOS or Windows, and no desktop install is involved, which is the part a Chromebook blocks.
Can it record the tab’s sound and my microphone at the same time? Yes, both sources are mixed into one track. You can also record either one on its own.
Is there a watermark or a time limit? No. Nothing is stamped on the video and the recording is not cut short.
Where does the file end up? In your downloads folder. The video is assembled locally and never uploaded.
What cannot be recorded? chrome:// pages, the Web Store, and the new tab
page. Chrome blocks extensions from capturing its own internal pages.
Keep reading
How to Record a Chrome Tab With Audio
Record any browser tab together with its sound and your microphone, then save it as a video file. No account, no watermark, no time limit.
Free Loom Alternatives in 2026: Browser Recorder vs Loom
Comparing Loom alternatives in 2026? Browser Recorder records locally with no five-minute cap and no watermark, free or $39 once. Here is how it stacks up.
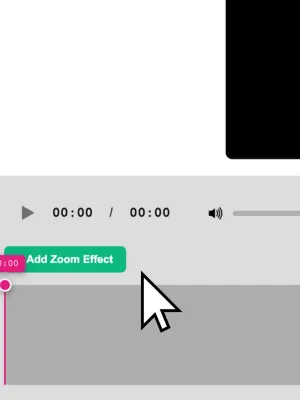
Browser Recorder vs Cursorful: A Free Cursorful Alternative
Cursorful charges $79 for commercial use, mic and camera. Browser Recorder is free. Here is how the two Chrome screen recorders actually compare.